

Atari Falcon DFB1X expansion
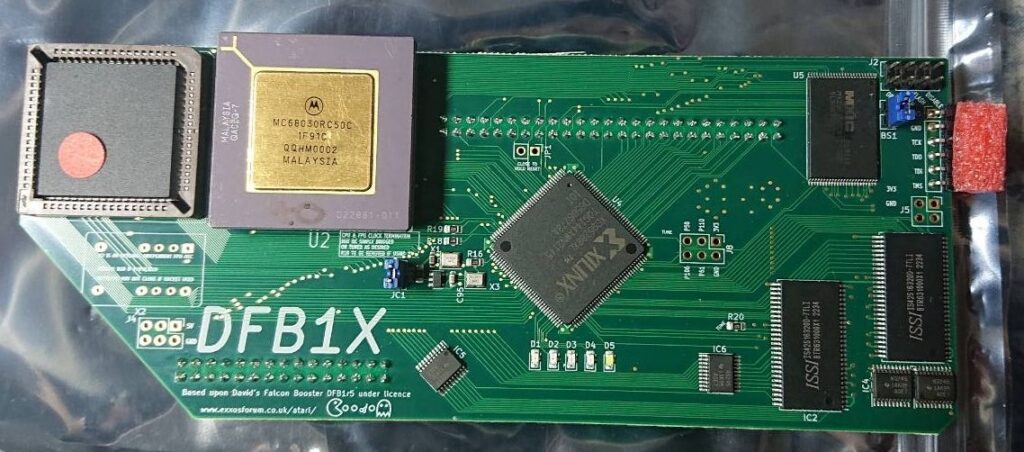
So here it is, thirty years too late, open source, low-cost memory expansion and accelerator board for the Atari Falcon. As some of you know Falcon’s mc68030 data bus was crippled by Atari to 16-bits and address bus was still reduced to 24 bits, but no more.
Of course 060 accelerator would be much better, but 060 cpu’s became very expensive and rare in full version (with integrated MMU and FPU), 060 compatibility isn’t great with older software, so I think that DFB1 is a great alternative, is more affordable and much easier to install (nearly plug & play).
DFB1X is a limited production run made by Exxos and is based on BadWolf’s DFB1 design. More about DFB1 project can be read here. Anyone can build DFB1 with proper equipment and skills. Personally I’ve given up, because soldering FPGA and SMD for me is scary. Below I will describe how to install this expansion and configure it. My board version is with 40MHz CPU and FPU.
Installation prerequisities
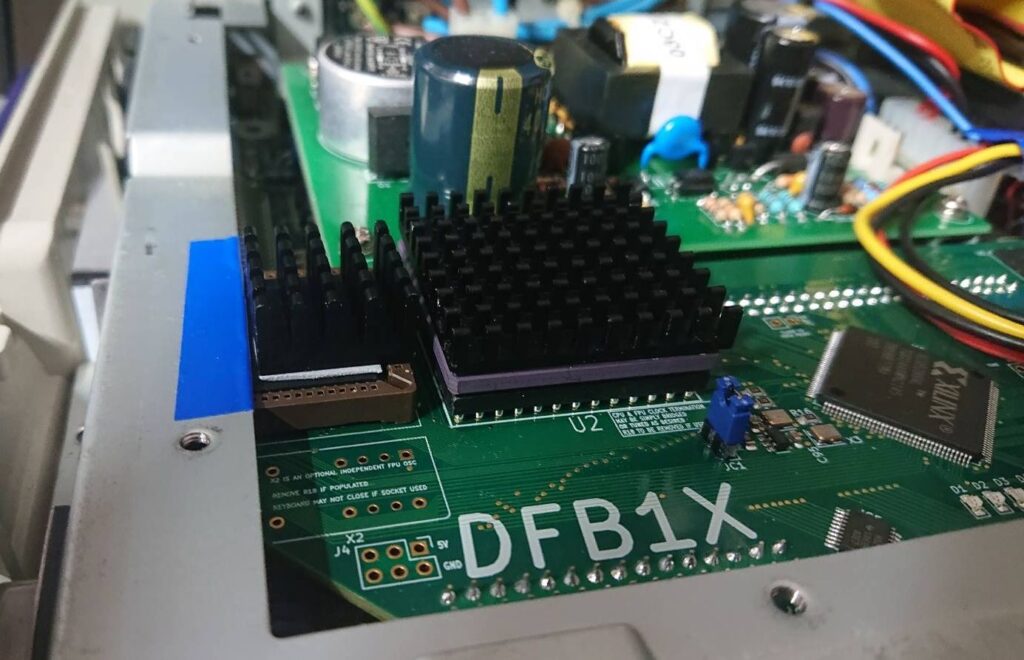
For my installation I’ve used two heatsinks (for CPU (34x34x6mm – anything higher will prevent case closing, 1cm was too high) and for FPU (19x19x1cm)), Noctua NFx10 FLX radiator (40x10mm fan, mine was 12V, but 5V will be good too), thermal adhesive (used for attaching heatsinks to NVMe drives) and thick insulation tape.
Installation
Firstly dismantle. Bad thing is that upper shielding has to be completely removed, otherwise cutting is needed. I chose to remove it . Lower shielding had to be detached partially on a lower part during board installation, without it plugging card wasn’t possible, board cannot be seated in expansion connector.

Before plugging the card, one jumper had to be removed expansion connector (remember to put in place when removing expansion, because machine will not work). Lower shielding touches FPU, so I’ve protected this part with thick insulation tape.

After that two heatsinks were glued with thermal adhesive to FPU and CPU (it get’s very hot very quickly). I’ve considered thermal glue, but it would be problematic if I would like to remove heatsinks in the future.
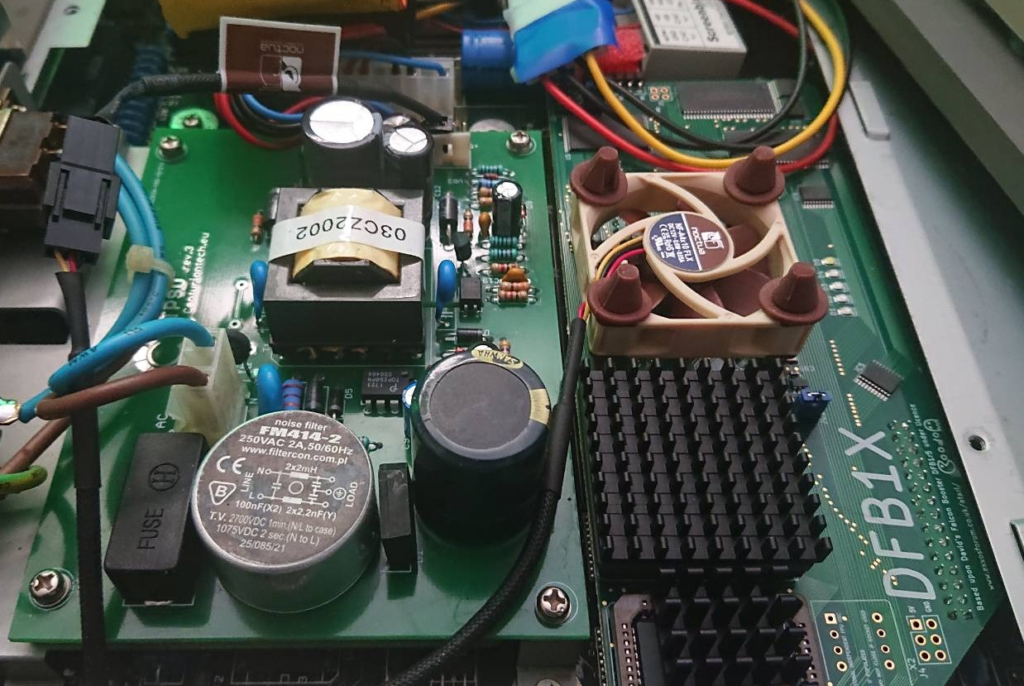
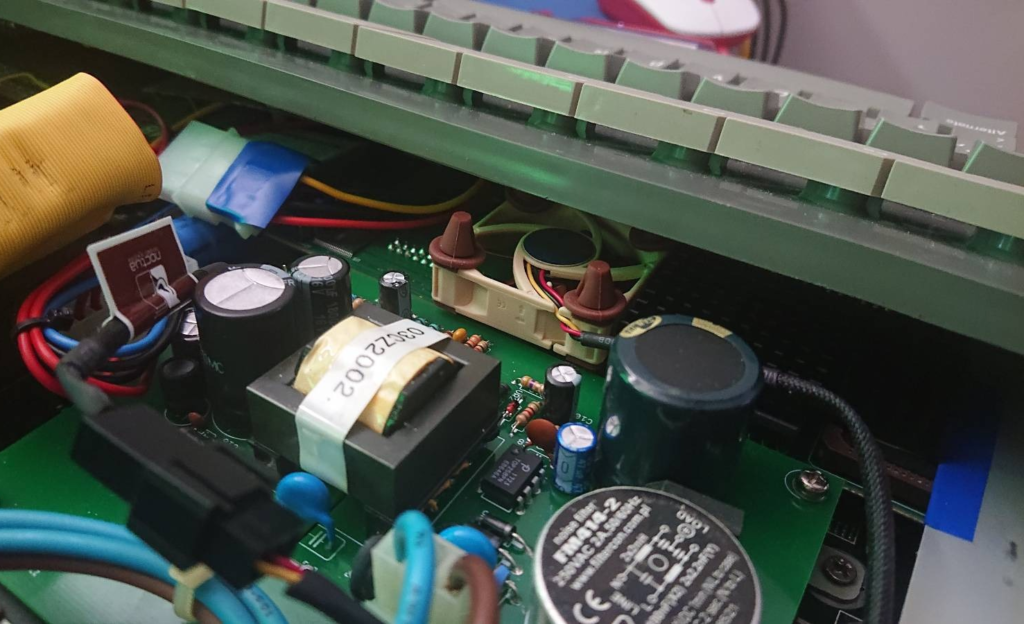
There is no possibility to mount fan on top of a CPU heatsink due to space constraints, so I’ve decided to place fan near CPU. Otherwise case cannot be closed, because keyboard will be lifted and will not rest on shielding. I’ve used rubber mounting materials from Noctua set to lift fan a little above the accelerator pcb, placed it and connected to 12V. Keyboard will be holding fan in place resting on shortened rubber mounts.


I’ve decided to enable DFB1X by default with flashed TOS 4.04. Otherwise several switches should be added (enabling / disabling DFB1X (useful if running ST software, because board cannot run at 8MHz), enabling/disabling TT / Fast ram, enabling/disabling flash ROM, switching Bank 0/1 for alternate ROM), but that would mean extra wires and drilling the case to mount them.
By default TOS4.04 is flashed in Bank 0. I’ve disabled DFB1X, enabled Bank 1, flashed latest EmuTOS (512KiB) to Bank 1, switched back to Bank 0 and closed the machine.
Software
To enable accelerator maprom_s.prg has to be launched first from the AUTO folder. As TOS4.04 VDI uses Blitter in portions of code (it cannot be disabled even from system and Blitter cannot access TT / Fast RAM) all VDI functions have to be replaced by NVDI ones, which are much faster and use CPU only. Without it GEM Desktop will look broken (missing icons, display, redraw problems etc..).
There is one thing to watch out, in HD DRIVER (if you are using it). In HDDRUtil Performance options disable Atari IDE “Blitter support”:
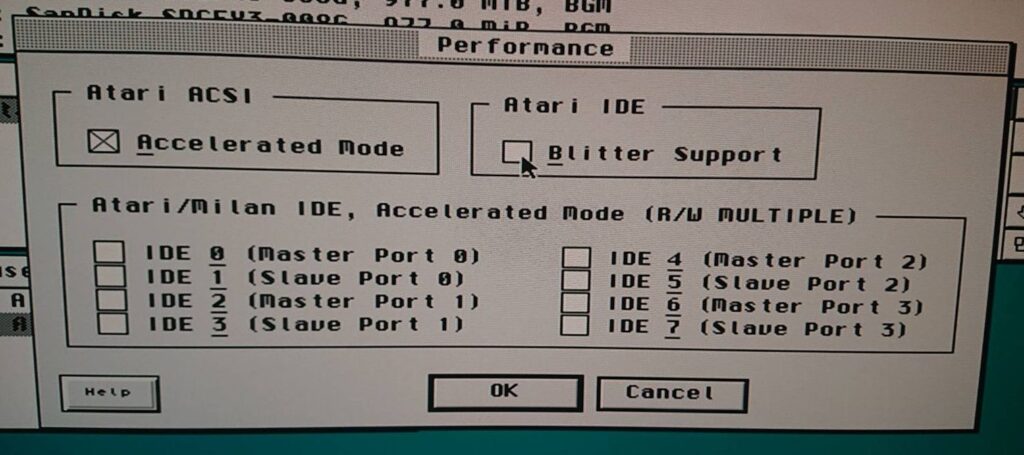
Without this option maprom_s couldn’t be run from AUTO folder and many programs couldn’t be launched giving three and 9 bombs (,but GEMBench and fpu tests ran somehow).
So, recommended sequence is maprom_s.prg, wdialog.prg, nvdi.prg set by AUTOSORT or via XBOOT III functionality.
maprom_s.prg is a part of TerribleFire Tools for Atari (hidden in maprom_old folder), which contains newer maprom_s (v2.2), but v.1.9 recommended by Exxos worked more reliably. I didn’t have much success with latest maprom.prg version from TFT repository.
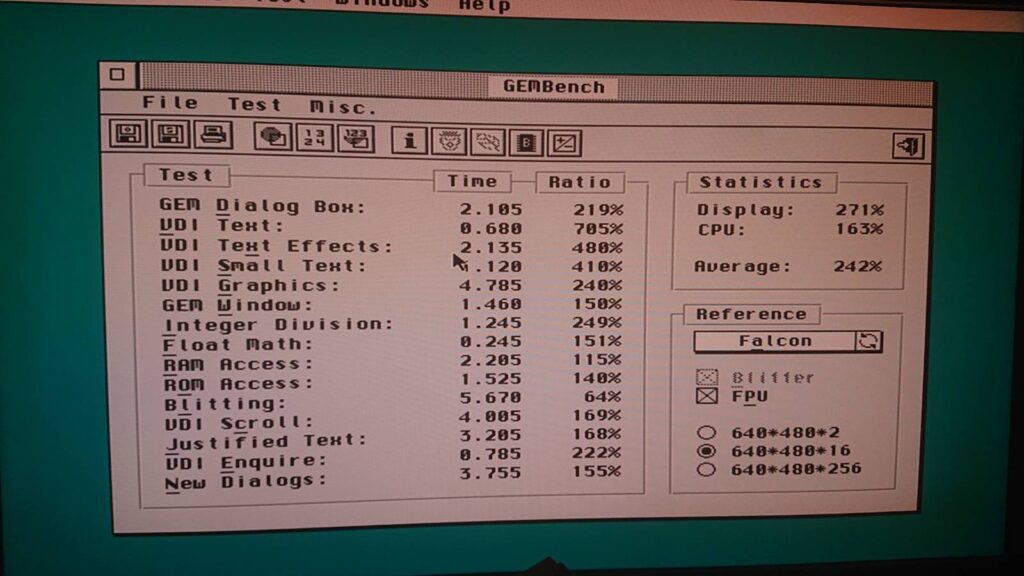
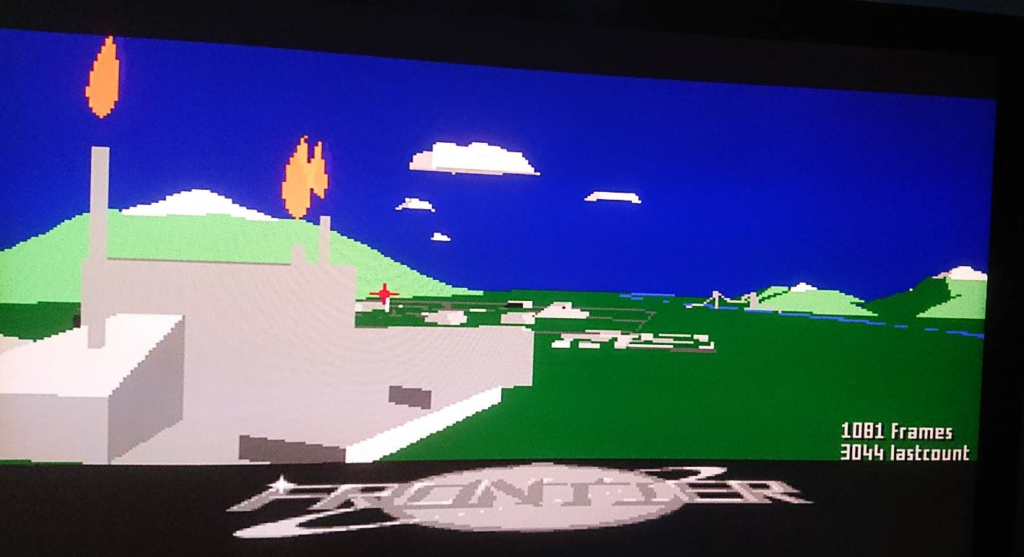
After that, I’ve prepared FrontBench (,which is hacked Elite II Frontier demo) and ran some benchmarking programs listed by Exxos on DFB1X support page.
FrontBench on RGB monitor gave me ~3782 frames, on VGA ~3044 frames.

I think that with some software adjustments everything might run much better. Currently HD Driver cannot benefit from TTRam / Fast ram, because maprom_s is ran from AUTO, but it might be fixed if maprom_s version will be run as a HDDRIVER module. This of course isn’t a problem if EmuTOS is used.
Probably I have to spent more time with this addon to draw more conclusions regarding software compatibility and issues (if any)…
O wpisie
Aktualnie czytasz “Atari Falcon DFB1X expansion,” wpis w [nokturnal].
- Opublikowano:
- 18 July 2023 16:33 PM
- Kategoria:
- Atari 16/32 bit, Falcon 030, Hardware, Modyfikacje sprzętu, Wieści
Komentarze są zamknięte
Aktualnie komentarze nie są aktywne dla tego wpisu.