Models photography, mini studio
Few words…
As few words of introduction, this article was inspired by blog post at Corvus Miniatures, which in turn was inspired by photo shot from Mantic Games studio.
When I’ve seen this post then I thought that aluminium box for miniature photography is a brillant idea, but I would done some things a bit different. I’ve experimented with small cardboards wrapped into aluminium several years ago to expose unlit areas of miniatures (Photoshop can’t do much with it), but I’ve dropped it, because it was unwieldy. If anyone of you have made photos of miniatures with one light source then I bet you have noticed few problems:
- Light isn’t uniformly distributed on the whole surface of photographed object. Some parts of object are well lit (or over exposed), some of them remain in the shadow (light is traveling from source to surface in straight lines and you can’t do anything about it (almost nothing), it’s physics ;) ).
- When you place lamp close to the object hot spots are created (the areas closer to the light source are becoming brighter and are additionally deepening the shadows). It doesn’t look nice and can change the appearance of the object and colour perception. Second thing those too bright spots are drawing attention of the observer (it’s in turn human psychology).
- Photographed object casts shadows.
In this situation we have several options:
- Take photos in daylight hours in well lit areas.
- Buy or prepare light tent with 2-3 light sources.
- Do yourself a box like presented below.
First option is good if you have sunny weather and you’re not working at night (which is not my case, because I’m a creature o f the night and everytime I go outdoors it rains ;) ).
Light tent is maybe the best option (it diffuses light as it should, eliminates hot spots), but takes time to set up, eats up a lot of space, needs 2-3 light sources to properly lit the object, additional lights are generating extra heat and can cost a little. In my case I had problems with space and setting up lights. Tripods that are small enough aren’t easy to find and I despise heat.
Third option is most reasonable, it’s quick to set up, you can take photos when you like, you need only one light source, it’s cheap and you can do it yourself in 1,5-2h if you have proper materials.
So, what we will need?
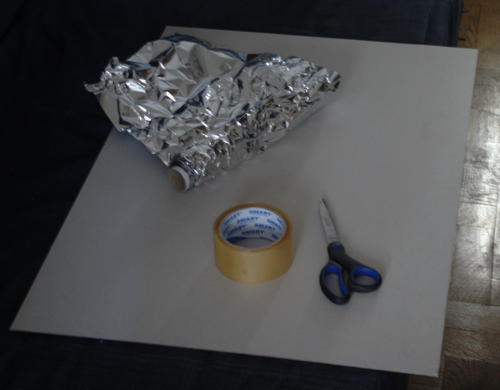
- Scissors,
- precision knife,
- translucent adhesive tape,
- 5/6 sheets of 2mm cardboard (a4 size),
- aluminium foil.
Cardboard is easy to get from your local art store. I’ve bought myself 80cmx60cm sheet, 2mm thick and cut it according to my needs.
In first step you are joining three a4 cardboard sheets with adhesive tape. Check it if you can fold them, before proceeding to the next step. You should fold it into one a4 sheet, I’ve made a mistake in mine and I couldn’t fold one a4 sheet inside, but I managed to fold it into a3.
Second step is sticking aluminium foil. And here is a little difference I’ve made – I’ve folded the foil before sticking it with tape. This will cause the surface from which light bounces more irregular and light will be more dispersed. It will force the light to bounce inside the box with wider spectrum of angles.
Another difference is using additional a4 sheet for upper part of the box. If light can bounce from bottom, right and left side, then why it can’t bounce from above?
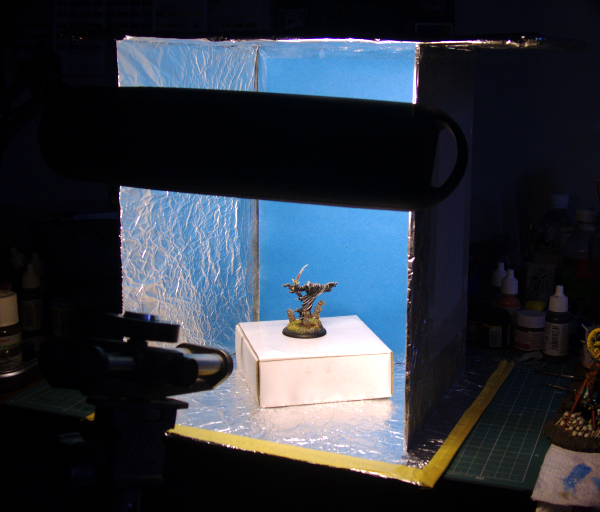
End result will look like this:
Adding backdrop and few other ideas
Now you can add your background (paint it/print it whatever you like) and attach it with clip or stick it to the a4 board as a backdrop. Another option would be to attach flat or textured colour material. This can be anything. On Corvus website you can find some ready to use backdrops made in Photoshop, so you can print them out right away.
On picture above I’ve put miniature on the box with plain blue background (it’s removable 2mm thick a4 cardboard with colour paper on it). Second option would be to shape the fabric of some kind, bending colour paper (maybe with nice gradient) and take a shots with/without the box(stand for miniature). I hope that this side view will be clear enough:
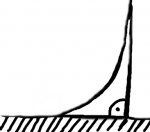
Another thing that came to my mind is adding semi translucent paper (breakfast paper)/white fabric (like in light tents) between the lamp and object to disperse light. This would eliminate hot spots once and for all and we could have best things of two worlds.
Examples
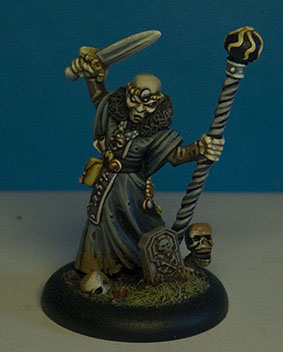
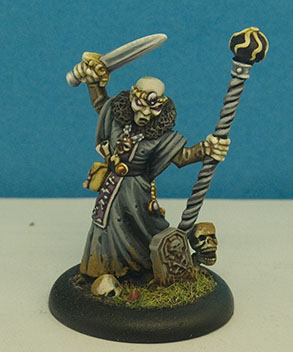
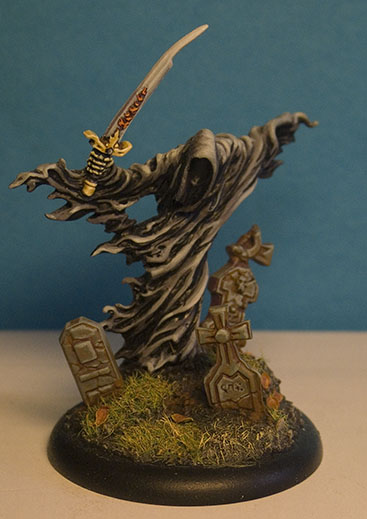
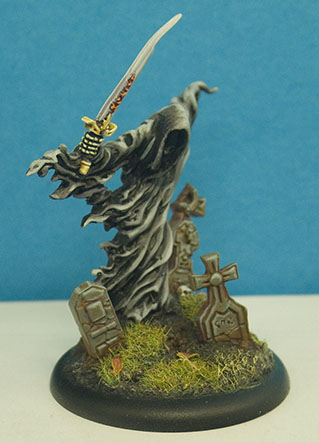
Below are example of photos taken with/without the use of prepared box, shot with the same camera settings and with one light source. I haven’t altered the photos, only cropped them.
Pay attention to shadows on both versions of photos (behind the model and on the left side). On right side photos they are completely eliminated and that’s it!
