Atari 520 ST+ stereo mod, bus, USB ports, RAM
Do you remember short ST from my earlier posts in april? It wasn’t fully done. Exxos RAM extension, which is inserted on MMU wasn’t good thing, it interfered with Lightning USB / Thunder IDE extensions and could malfunction, for example, when unit was moved around or table was hit accidentally. I wasn’t 100% sure that all connections were firm enough. I didn’t connect USB ports last time and in the meantime I wanted to add stereo audio modification, because plain STs can only output sound via monitor connector in mono (this has changed from Atari STe model and up), also ym2149 soundchip has three channels, which two of them are hardwired together (A and B). Usually, I pass all the audio sources (other computers, midi modules etc.) to external audio mixer, which outputs sound to an amplifier or speakers. I couldn’t connect STs like this before and mono sound came only from monitor speakers.
Bus resistor arrays exchange
This was missing modification, as ST data / address bus is weak removing original 10kOhm bus resistor arrays and replacing them with 2,2kOhm ones is a good idea.
Adding USB ports
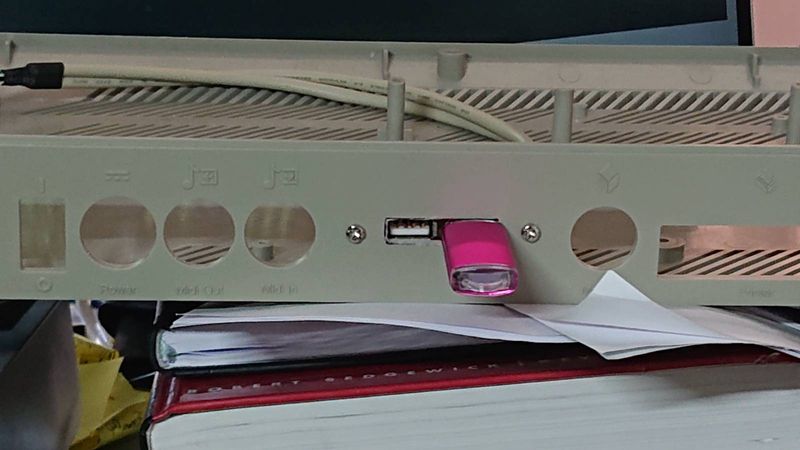
Some additional adjustments to computer case had to be made before I could attach usb bracket. I had to remove original shielding from it and drill two holes to mount it in place of missing modulator. Additionally I’ve had to add place for stereo / mono switch as a fallback for tunes, which use samples. This also meant further shielding adjustments ;(.

4MiB RAM upgrade exchange
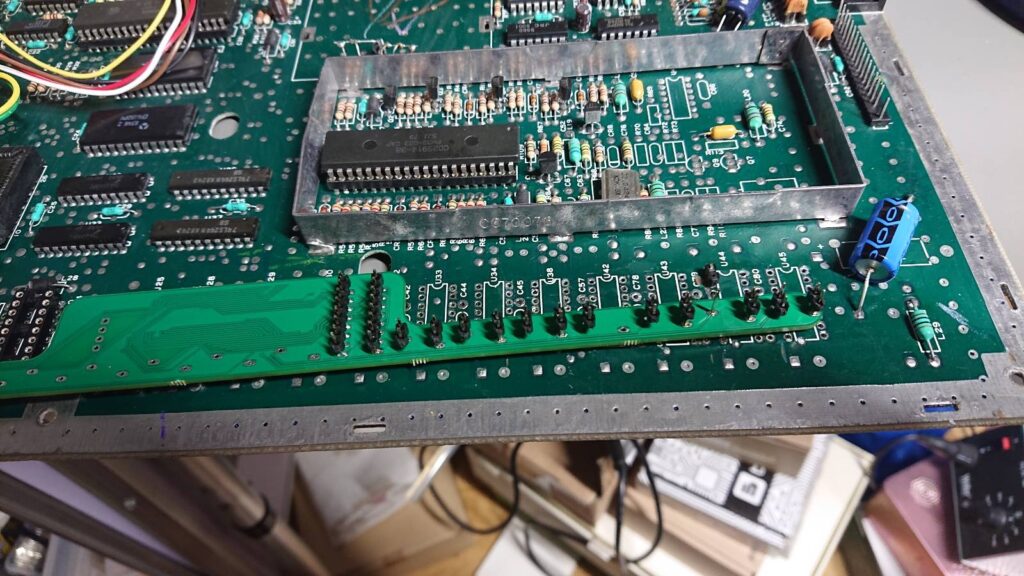
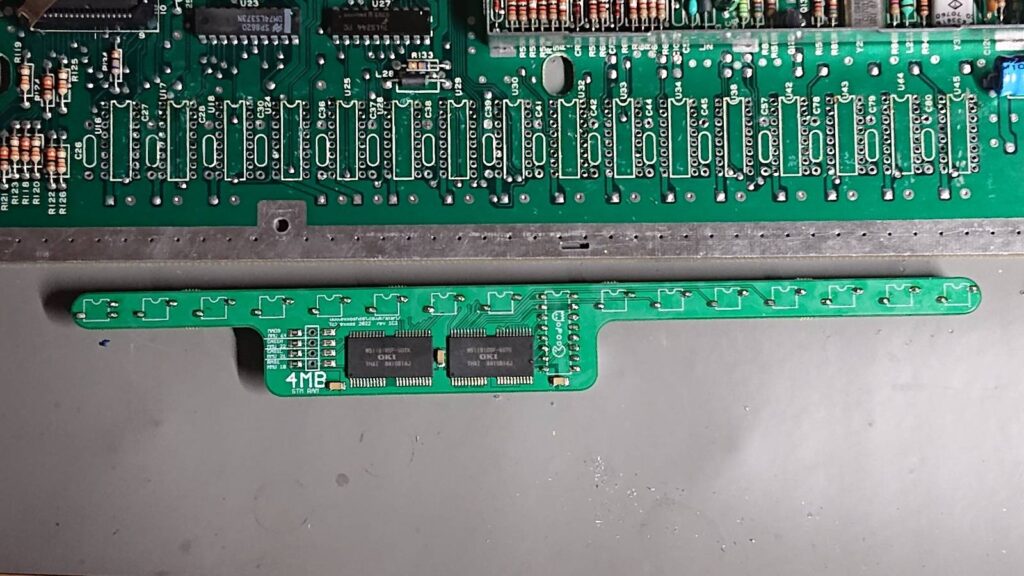
RAM upgrade for short STs (260 / 520ST and similar) was never easy. Either you bought a kit mounted on MMU, which weren’t very reliable due to mechanic reasons or you had to solder (or tell someone to do this) new set of chips on the old ones (piggyback style, good luck!). Fortunately there are new solutions for soldered ram for short STs: Agranlund 4MiB ST ram, which you can assemble yourself and Exxos one, which is similar to Agranlund, but is more compact. I had to remove earlier Exxos expansion (,which is kind of MMU mounting kit) and had to prepare all motherboard’s solder points, where original RAM chips resided. I’ve removed them earlier, but cleaning and clearing throughholes was very tedious, because of old, stubborn solder.
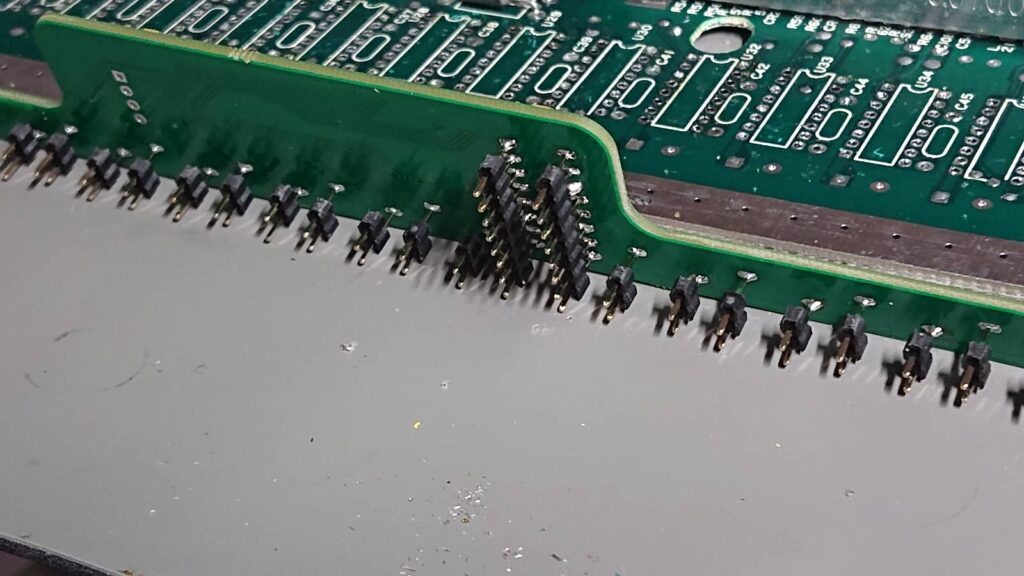
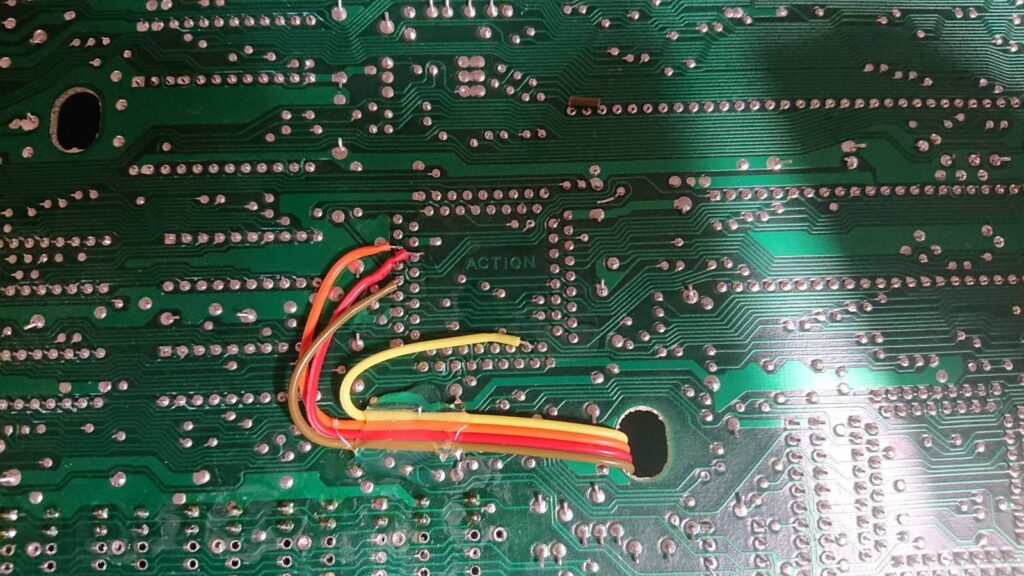
If you are without proper skill, patience and equipement I discourage you for installing this board. I’m not kidding. All the chips need to be desoldered without damaging the mainboard, which is not easy, there’s alot of them. Additionally pins need to be soldered on RAM board itself, one by one before anything else. Simultanously you have to check if RAM board still fits on motherboard and all pins are aligned correctly at all stages. When all pins are in place you can actually fit the expansion on motherboard and solder it on. Rest is easy, several signals need to be connected to MMU under motherboard with supplied cable and thats it. Additionally, I cut off header pins on supplied cables, soldered all the wires directly to RAM expansion board and secured them with hot glue. Everything fits under shielding which is nice.
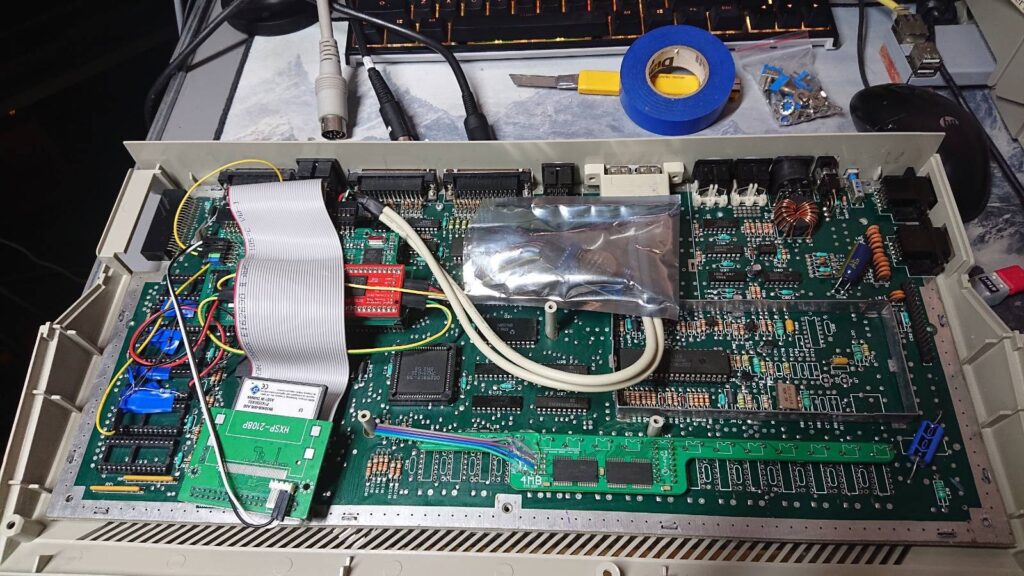
Here’s more photos from another short ST (520STM) in which I’ve extended memory too, really nice machine (with modulator), got it recently, because it looked like unused and got QWERTY keyboard (first in my life, all earlier STs got german layout). I didn’t pass willpower test when I saw it and had to buy it, but was unusable with 512kib of RAM and TOS 1.02 (hard drives didn’t boot):



Stereo Mod
There are two versions of Stereo mod circulating on internet, one based on capacitors and resistors (MV-1FZ_Stereo_Mod), second uses potentiometers with resistors. Of course there is also Tweety Board, but good luck with finding one for a reasonable price. I went with solution using potentiometers. I’ve assembled circuit on a small protoboard:

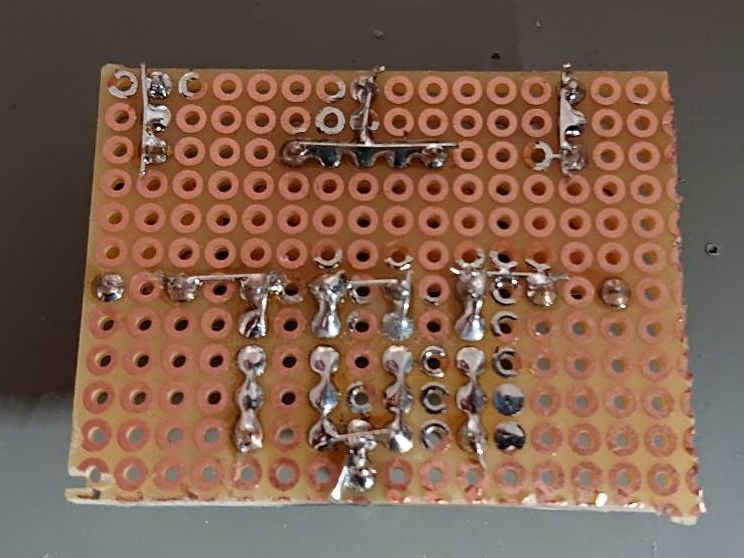
I’ve arranged elements as tight as possible to have smallest pcb possible. I’ve planned to use header pins, but in the end I soldered all signals underneath the board. Numbers correspond to signals from ym2149 chip and left / right output to the audio connectors with unmarked ground in the middle.
YM2149 was socketed already and this made job alot easier, turned out that only pins 4 and 38 need to be lifted from socket.
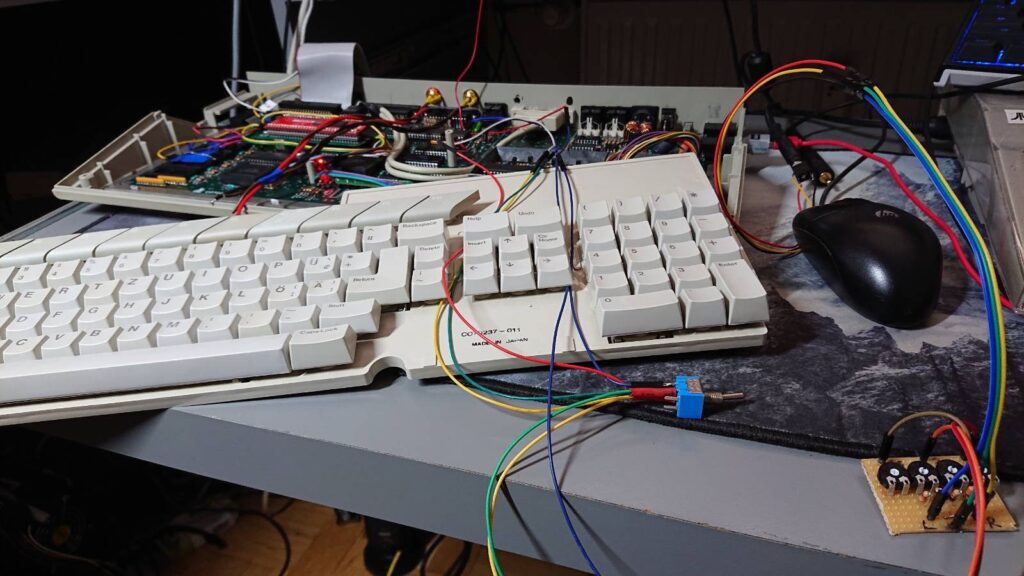
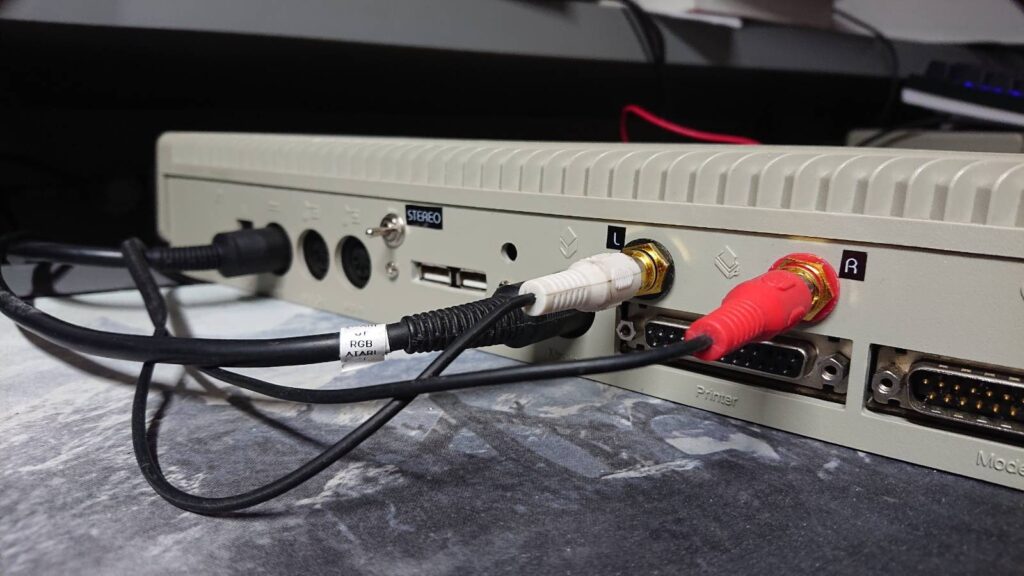
After that I’ve added two stereo cinch / RCA sockets over parallel port, made holes for minijack and DPDT switch. Circuit was connected to DPDT switch, which was also wired to ym2149 signals and ST motherboard. I’ve launched YM2149 tracker (like maxYMizer)), fired up sample tunes, adjusted potentiometers and tested an outcome on speakers / headphones:
When everything was working as intended I’ve placed board behind USB port with proper insulation underneath (simple, electric insulation tape), made signal cables as short as possible, soldered switch to stereo board and ym2149 signals and soldered stereo board L/R audio output to cinch / RCA sockets. In the end I didn’t mount minijack socket, the one I’ve bought couldn’t be attached – case was too thick. Saved it for the future.
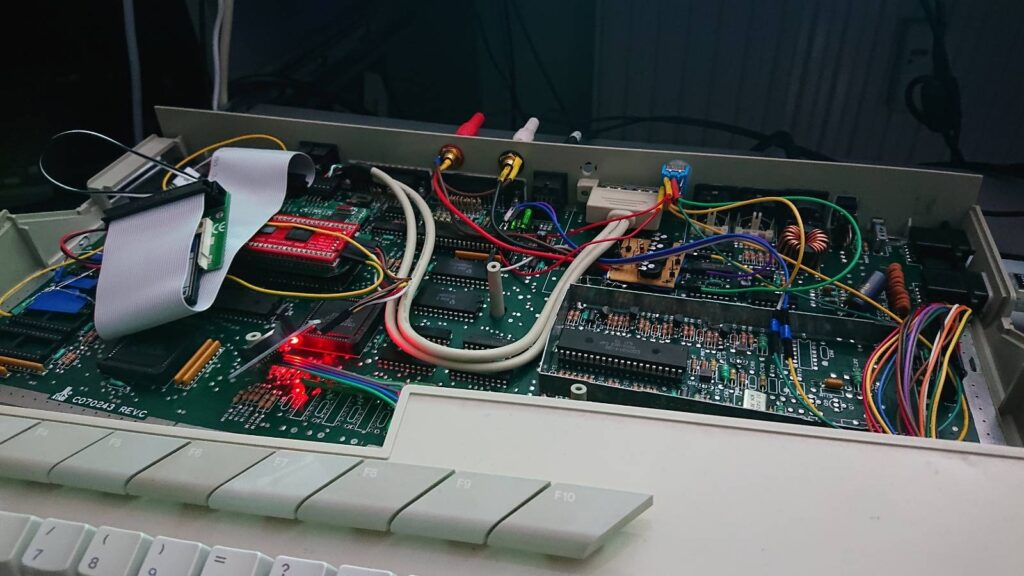
End result
So, after modifications, back panel looks like this:
Nice! You survived to an end ! :)
O wpisie
Aktualnie czytasz “Atari 520 ST+ stereo mod, bus, USB ports, RAM,” wpis w [nokturnal].
- Opublikowano:
- 8 May 2022 10:25 AM
- Kategoria:
- ST/STe, Modyfikacje sprzętu, Wieści


Komentarze są zamknięte
Aktualnie komentarze nie są aktywne dla tego wpisu.