

OPL2LPT / OPL3LPT on Atari ST / TT / Falcon030

Sometime ago, I have noticed some materials on web regarding OPL2LPT project. In short it allows connecting Yamaha OPL2/3 chip to any device, allows FM sound synthesis and replay music as heard on Adlib soundcards used in PC’s of old and has Centronics (a.k.a. parallel / printer / LPT) interface. Printer ports are mostly unused and I wondered, if I could connect it to Atari and use it as an additional sound device. And let’s be clear now, I’ve started this project, because I thought it will be quick and easy :) (famous last words). Just few wire rearrangements and proper drivers. … And I didn’t make any hardware projects before.
Ok, but what are benefits of connecting OPL3LPT / OPL2LPT? Well, we can use OPL2/3 FM synthesis without using alot of cpu time, which is quite scarce on Atari’s, we can use it on plain Atari ST, we don’t need ISA interface (it’s possible to connect real Sound Blaster card via VME bus on some Atari models), we have possibility to play with it via midi, also reproducing sound from other platforms is easier (DOS games, MSX computers …), converting ym2149 tunes for fm chip. So, it will have it’s use in game ports, emulators, music players and trackers. Drawback is that you have to buy OPL3LPT and make an actual adapter. Probably I will run small batch of adapters if there will be enough demand.
Funny is that that first FM synthesis devices were already produced for Atari in form of cartridge in FM Melody Maker package (Hybrid Arts, 1989), but sound output was rather similar to kid’s piano keyboards. Melody Maker contained FM chip labelled MS1824 / 2423B-Y, which was identical to YM2413, but had different instrument presets. Basically it was low cost, feature stripped OPL2 chip and wasn’t very programmable (actually there wasn’t any info about accessing it, only premade software):
What if we put inside a cartridge something better?
So how it happened? Firstly I’ve done some research and I saw discussion on Atari Forum regarding this device and noticed that some people succesfully had used it with old PC’s. Unfortunately OPL2LPT became obsolete, because of OPL3LPT, which contained better version of Yamaha chip and had two operating modes: OPL3 and compatibility OPL2. So, I’ve ordered one device. I was also very impressed by FM-YAM project on c64, which is inspired by SFX Sound Expander package (made in 1985 and contained OPL1 chip). FM-YAM is basically cartridge with OPL1/2 chip (YM3812 or YM3526) connected to c64, which FM output can be feed optionally into SID filters:
On Falcon we could do similar thing and connect FM output to internal sound matrix and mix it with ym2149 output and/or pass through DSP effects or filters.
Interfacing with Atari printer port
I’ve contacted Daniel Illgen (Insane / TSCC), who had some sucess with interfacing OPL2 chip via ROM port interface and he gave me some instructions how this device could be connected to ST, how to talk to it and has sent me replay sources for ROM / Cartridge port, which I took and started to adjust for LPT / Centronics replay.
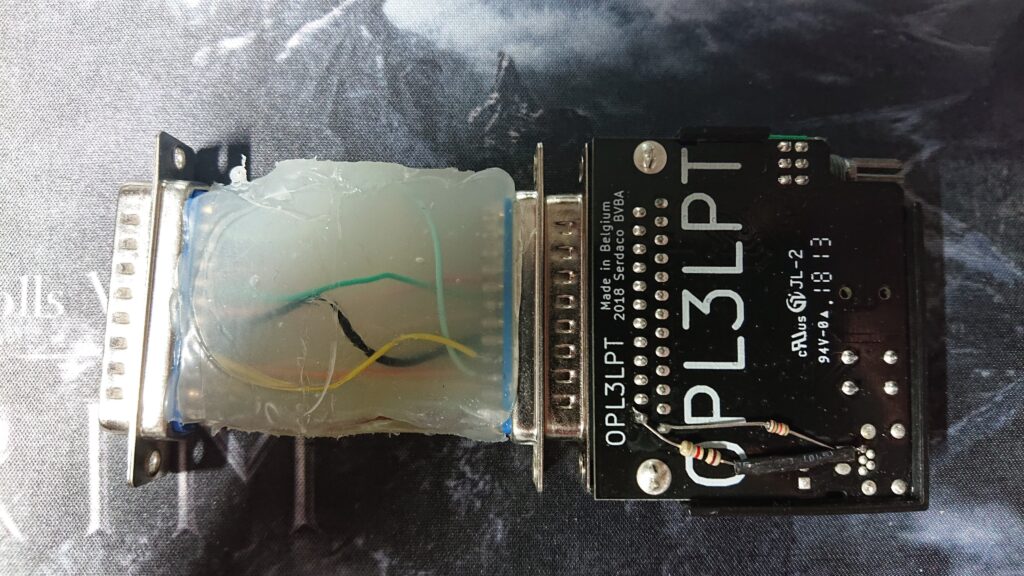
After some research with ST Internals, Atari Falcon developer manual and Atari Falcon Schematics I came up with first version of an adapter, which could be used to connect Atari Falcon030 / ST to OPL3LPT.
Turned out that ST port isn’t fully due to lack of signals in ST printer port, OPL3 features are not possible to use when connected via printer / centronics port, this is not true for cartridge / ROM port adapter. Also OPL3LPT \RD signal is set to high, so there is no possibility to read anything from OPL chip. It is set permanently to ‘write’ mode. But this is not crucial if we want to replay sound. First version of an adapter looked like this:
Talking to Falcon030 / ST centronics port
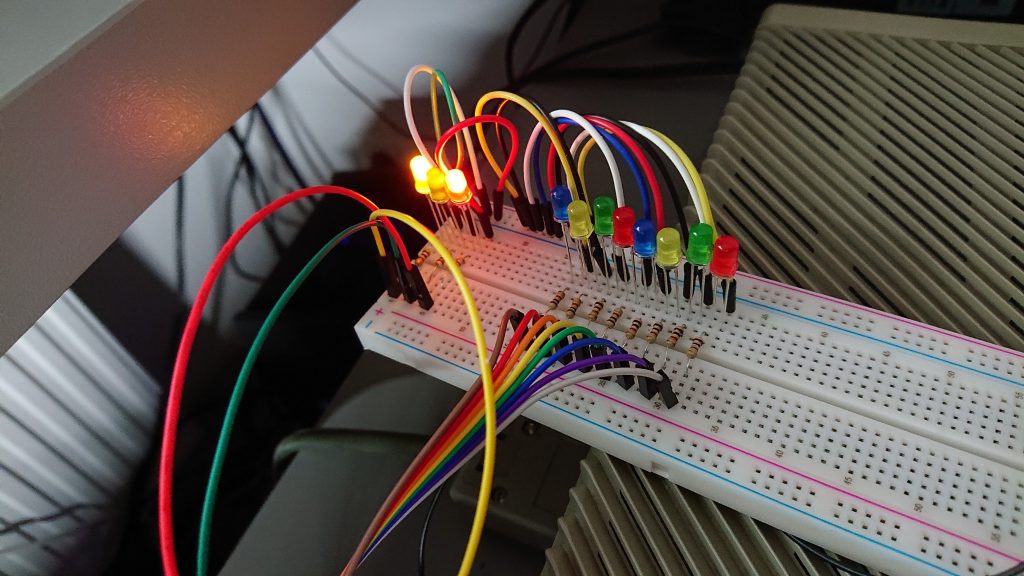
As I didn’t program Centronics port on Atari’s before I’ve recieved some hints from Daniel and guys from Atari Forum about it, but I was unsuccesfull with generating anything out of OPL3LPT, so I’ve constructed small led circuit on breadboard to see which pins I’m setting. This was good decision, but as it turned out later not the best.
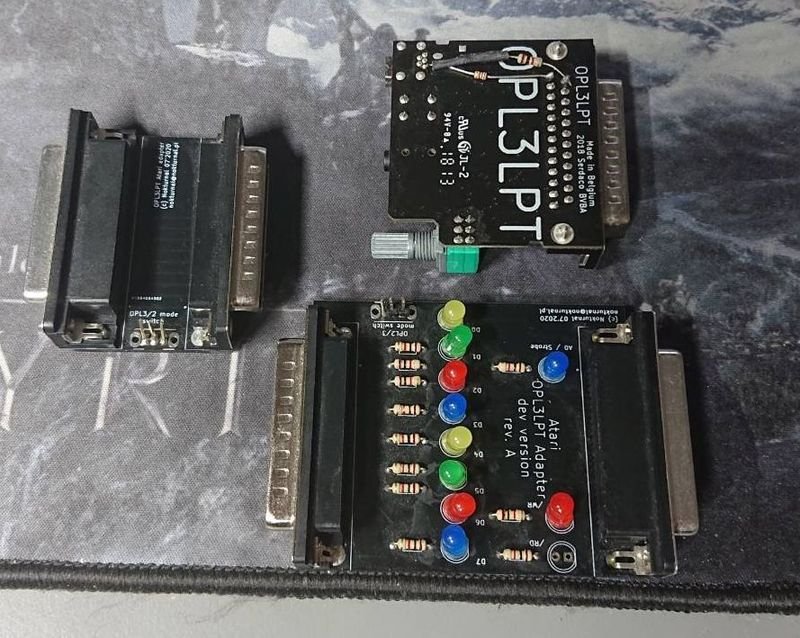
Firstly I’ve created program, which actually set individual bits via Xbios, after that I’ve made alternative version bypassing opearating system. When everything behaved correctly I was ready to adjust test replay routines. But before that I’ve made quick KiCad crash course, designed pcb (first in my whole life, actually made two: one for end user, second for development), ordered all needed parts and sent gerbers to manufacturer. After week or so I’ve got shiny new PCBs and I’ve assembled first prototypes.
I hoped that I will manage to output some sounds very quickly. Unfortunately, there was no positive outcome, I wasn’t able to produce any sounds, maybe some unpleasant, random noises at best and that’s it. Additionally Exxos has pointed me out that there is flaw in my design and that diodes can influence signals on my development pcb version and possibly adding some buffers would be required. As I didn’t have proper equipment, I gave up and project went back to drawer for some time.

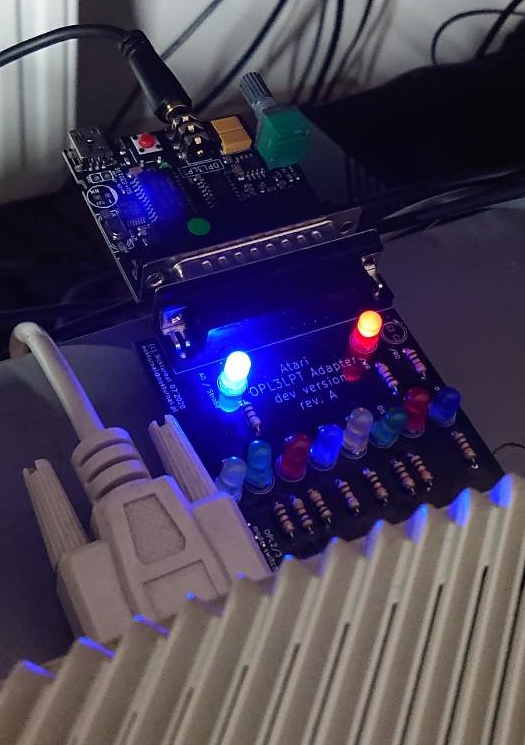
Recently I’ve made some investments in equipment, bought simple logic analyser and returned to abandoned project. Turned out that logic analyser is not that dumb thing to have and I was able to see, what I’m actually doing at hardware level. So, after reworking my development pcb to be able to connect logic analyser probes instead of diodes, finishing some additional programs to test timings and manipulating printer port lines. I’ve managed to adjust ROM player code to make an output through OPL3LPT synth:
After I showed this sample I started to receive some input from more hardware oriented guys, which was great and I’ve managed to fix most important issues with adapter like GND taken only from shielding (adapter ceased to work when logic analyzer probes were disconnected) and reduce possibility of hardware damage of ST models shipped before Mega ST related to pullups on /BUSY line.
Here is BitBucket repository with adapter schematics and test program (https://bitbucket.org/nokturnal/stfmtest). Now anyone can assemble similar adapter and use FM sound sythesis on Atari ST’s and up.
Of course this is just the beginning. To benefit new chip new software has to be written like native players, trackers, integration with game ports, music programs and so on. Possibly OPL2/3 cartridge will emerge at some point too.
If you like this Atari project or others, want to see more in the future, then feel free to donate to help me cover partially my development time and expenses related to hardware. Thank you!
About this entry
You’re currently reading “OPL2LPT / OPL3LPT on Atari ST / TT / Falcon030,” an entry on [nokturnal].
- Published:
- 30 April 2022 3:45 PM
- Category:
- Atari 16/32 bit, development, Falcon 030, OPL2 (YM3812), OPL3 (YMF262), ST/STe, TT, News
Comments are closed
Comments are currently closed on this entry.